Godot guide · · 6 min read
Godot 2D shaders: hit flash, outline and dissolve for sprites
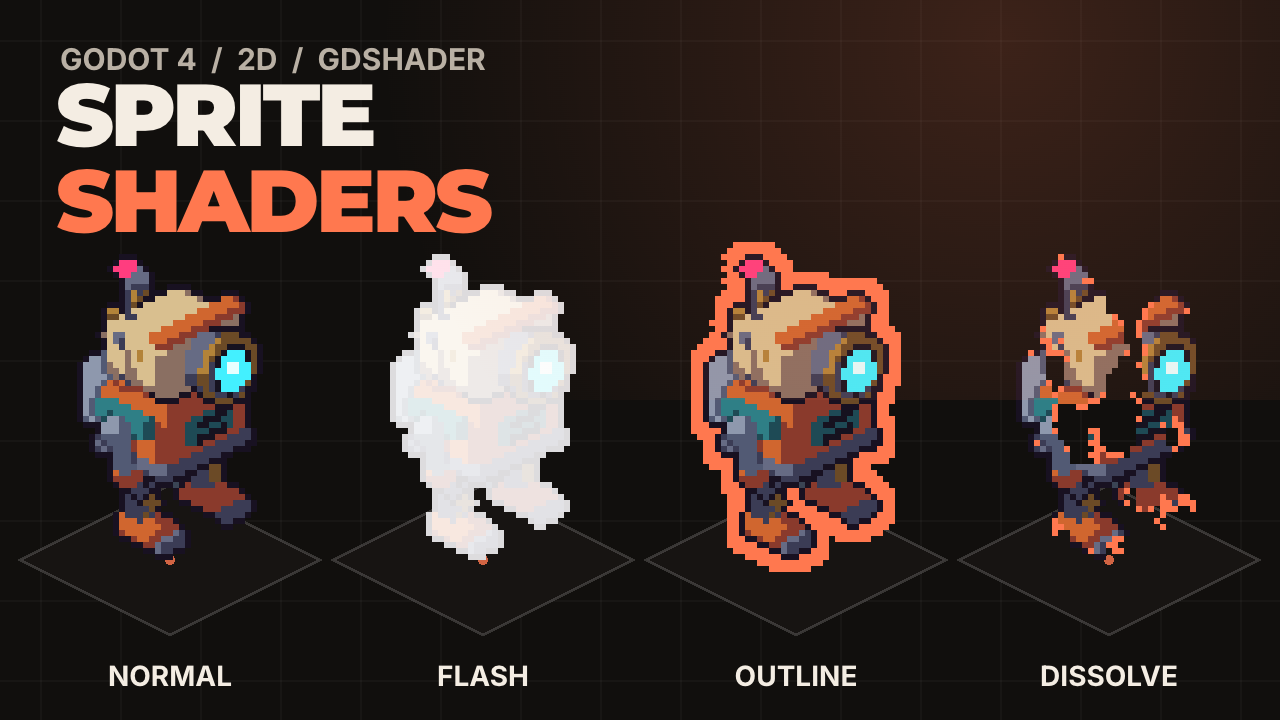
Three canvas_item shaders for Godot 4.5 sprites: hit flash, outline and dissolve, with the code and captures rendered in the engine on isometric robots.
How do you add a shader to a 2D sprite in Godot 4?
Select the Sprite2D, open CanvasItem in the Inspector, set Material to a new ShaderMaterial, then set its Shader to a new shader. Godot opens the editor with shader_type canvas_item; at the top, which is the type for anything 2D. The three effects below are each one short file, and every capture was rendered by Godot 4.5.1 with exactly this code.
The robots are isometric sprites from our Robot Series packs, each standing on the center of a 2:1 floor tile, which is how those sprites are meant to be placed. A shader does not care which of the 8 directions a sprite faces, so everything here works on any frame. For the sprites themselves, see 8 direction isometric sprites in Godot.
One built-in matters more than the rest: COLOR. In fragment() it already holds the texture color multiplied by the node's modulate, and it is also the output. The CanvasItem shader reference notes that writing COLOR = texture(TEXTURE, UV) throws the modulate away, while starting from COLOR keeps it. All three shaders start from COLOR.
How do you make a hit flash shader?
Mix the sprite color toward a flash color by an amount between 0 and 1. At 1 the sprite is a solid silhouette, and its alpha is not touched, so the shape stays the same. The white sprite in the capture is flash_amount = 1.0, the red one is 0.7 of a red.
Set the amount to 1 on the hit and tween it back to 0 in about 0.12 seconds. The capture runs at 15 frames per second and holds 1.0 for two frames, then 0.6 and 0.3. At 60 fps a tween does the same job. I ran this code in a headless test: the value went 0.86, 0.72, 0.58 and so on, reaching 0 on the 8th frame.
The mistake that bites everybody: a material is a resource, so two sprites using the same one share every uniform. Flash one enemy and the whole wave flashes. In a test, a second sprite with the same material read the 0.5 I set on the first. After material.duplicate() it did not. Duplicate the material in _ready() for every enemy, or turn on Local to Scene on the material.
Keep the effect short. Two to four frames of flash reads as an impact. Much longer and it reads as a status effect, which is a different thing to show the player; see the game feel checklist for what else to add to a hit.
shader_type canvas_item;

uniform vec4 flash_color : source_color = vec4(1.0, 1.0, 1.0, 1.0);
uniform float flash_amount : hint_range(0.0, 1.0) = 0.0;

void fragment() {
	// COLOR is the texture times the node's modulate, so both still work.
	COLOR.rgb = mix(COLOR.rgb, flash_color.rgb, flash_amount);
}


# Called when the enemy is hit.
func hit() -> void:
	var material := $Sprite2D.material as ShaderMaterial
	material.set_shader_parameter("flash_amount", 1.0)
	var tween := create_tween()
	tween.tween_property(material, "shader_parameter/flash_amount", 0.0, 0.12)
How do you draw an outline around a sprite?
For every pixel, look at the neighbors at a distance of width texels. If the pixel is empty and any neighbor is solid, paint the outline color. The TEXTURE_PIXEL_SIZE built-in is the size of one texel in UV units, so the width is in sprite pixels and stays correct at any scale.
Use 8 neighbors, not 4. With 4 samples, a corner of the sprite has no neighbor reached at width 2 or more, and the outline gets gaps on the diagonals. The cost is 8 texture reads per pixel. That is fine for a selected unit or a pickup. I did not measure it on a phone, so test it there before you put it on a crowd.
The second mistake is the quad. A shader runs only on pixels inside the sprite's rectangle, and an outline sits outside the sprite. The left robot in the capture uses the tight texture and its outline is cut flat at the top, left and right. The right one is the same art with 4 transparent pixels added on every side, and the outline is whole. Pad the art, up to the widest width you plan to use.
The same applies to sprite sheets: frames need at least width transparent pixels between them, or the outline reads the neighbor frame.
shader_type canvas_item;

uniform vec4 outline_color : source_color = vec4(1.0, 0.47, 0.31, 1.0);
uniform float width : hint_range(0.0, 4.0, 1.0) = 1.0; // in texels of the sprite

const vec2 DIRS[8] = vec2[8](
	vec2(1.0, 0.0), vec2(-1.0, 0.0), vec2(0.0, 1.0), vec2(0.0, -1.0),
	vec2(1.0, 1.0), vec2(-1.0, 1.0), vec2(1.0, -1.0), vec2(-1.0, -1.0)
);

void fragment() {
	float near = 0.0;
	for (int i = 0; i < 8; i++) {
		near = max(near, texture(TEXTURE, UV + DIRS[i] * TEXTURE_PIXEL_SIZE * width).a);
	}
	// Only paint where the sprite is empty and something solid is within reach.
	COLOR = mix(COLOR, outline_color, near * (1.0 - COLOR.a));
}
How do you make a dissolve shader with noise?
Read a noise value for each pixel and compare it with a progress uniform. Pixels with noise below the threshold become transparent, and the thin band just above it gets an edge color. At progress 0 everything shows and at 1 nothing does.
Make the noise in the Inspector: set the uniform to a new NoiseTexture2D with a FastNoiseLite noise. The capture uses 64 by 64 pixels, frequency 0.06 and seed 5, which gives blobs about as big as the robot's parts. A bigger frequency gives a grainier dissolve.
The line that makes it look like pixel art is the snap. Without it the cut passes through the middle of a sprite pixel, and a pixel is half gone. Rounding the UV to the center of the texel makes pixels vanish one whole pixel at a time.
Noise values cluster around the middle, so progress is not linear in what you see. In the capture almost nothing had changed at 0.14 and little was left at 0.74. If you want a steady look, remap progress with an ease or tween it over a longer time and let the middle do the work. The right robot has edge_width = 0 to show what the glow adds.
shader_type canvas_item;

uniform sampler2D noise : filter_nearest, repeat_enable;
uniform float progress : hint_range(0.0, 1.0) = 0.0;
uniform float edge_width : hint_range(0.0, 0.3) = 0.08;
uniform vec4 edge_color : source_color = vec4(1.0, 0.47, 0.31, 1.0);

void fragment() {
	// Read the noise once per sprite pixel, so pixels vanish whole.
	vec2 snapped = (floor(UV / TEXTURE_PIXEL_SIZE) + 0.5) * TEXTURE_PIXEL_SIZE;
	float n = texture(noise, snapped).r;
	// progress 0 shows everything, progress 1 shows nothing.
	float d = n - mix(-edge_width, 1.0, progress);
	if (d < 0.0) {
		COLOR.a = 0.0;
	} else if (d < edge_width) {
		COLOR.rgb = edge_color.rgb;
	}
}
Why does my shader look wrong on pixel art?
Most problems come from one of these:
- Texture filtering. In Project Settings, Rendering, Textures, set Canvas Textures Default Texture Filter to Nearest, or the sprite is blurred before the shader sees it. The demo project sets
default_texture_filterto 0. - Non integer scale. At 4.5x some sprite pixels are wider than others, and every effect inherits that.
- Flash that ignores
modulate. Start fromCOLOR, not from a fresh texture read. - Outline cut at the edge of the texture. Pad the art.
- One material for many sprites. Duplicate it, or the effect plays on all of them.
- Two effects on one sprite. A node has one material, so merge the effects into one shader with an
amountper effect, or put the outline on a duplicate sprite behind it. For particles on top of the flash, see GPU particles in 2D.
Questions people ask
- How do I flash a sprite white when it is hit in Godot 4?
- Use a canvas_item shader that mixes
COLOR.rgbtoward white by aflash_amountuniform, set the uniform to 1.0 on the hit, and tween it to 0.0 in about 0.12 seconds withtween_property(material, "shader_parameter/flash_amount", 0.0, 0.12). - Why is my Godot sprite outline cut off at the edges?
- A canvas_item shader only runs inside the sprite's rectangle, and an outline is drawn outside the art. Add transparent pixels around the sprite in the texture, at least as many as the outline width.
- How do I animate a shader parameter in Godot?
- Call
set_shader_parameterfrom script, or tween the property pathshader_parameter/<name>on the ShaderMaterial. Both work, and a Tween needs no per-frame code.